


No products
To be determined Shipping
0.00 CHF Total
Blog Categories
Latest Posts


Choose an appropriate drone to start is a key step to get a good start.
After several years of experience trying, building, creating, breaking and repairing any kind of drone, this article presents our point of view and our best advices, built and analyzed over the years. Of course, we don't pretend to hold the one and only truth... But our own. Nevertheless, you will find here a set of keys to help you making your choice of aircraft. In the flying machine world, the choice of drone is not unlimited, but almost. For someone who is new in the game, it's hard to make a choice with all these different possibilities. Whatever your final goal (Drone Racing League champion?), it is always good to start smoothly. That's why our first advice is to learn with a small and lightweight drone. Even if some bigger and more advanced drones are very easy to handle, the damage in case of loss of control or technical failure can be significant. A mini drone will allow you to get familiar with the basic controls, to position yourself in space according to the different rotation axes and above all, to get used to not getting in panic... Or at least to not having the wrong reflexes in case of panic... Major cause of the most destructive crashes. And if the crash is nevertheless destructive, the financial impact will be much more limited. Before going to the next level, making your drone fly with the transmitter must become as instinctive as driving your car or your bike. | ||
Flight assistance systems
To start, several on-board instruments can help you. Here are a few examples, each time mentioning the help provided and the long-term use or not, depending on your objectives. The GPSThe GPS allows the drone to locate itself in space. Although useless for indoor drones, it is very useful for outdoor drones to be able to determine their position. Indeed, it is this module which enables the drone to have a precise positioning and a precise piloting assistance, even predefined paths or flight modes like follow me. It also allows the use of RTH (Return To Home) so that the drone automatically returns to its initial position. Available on most drones beyond a certain range of products, it is essential on aerial photographic drones for a proper framing without flight disturbances. BarometerThe barometer is an instrument to measure atmospheric pressure. This is mainly used for altitude and height measurements. Aboard a drone, it will allow it to stabilize its height (altitude hold mode). Associated with the gyroscope, it enables a stable stationary flight without any pilot intervention. For a complete beginner, the altitude hold mode is a good option because it allows you to focus on the direction channels. It will be the first element to discard for learning to fly a little more wildly. It is, however, useful whatever your level for an aerial photographic drones. The GyroscopeIt is an angular position sensor along one or more axes. In the world of UAVs, it allows these flying machines to stabilize their pitch axis (nose up, nose down), yaw (movement to the left or right while remaining on a flat axis) or roll (left or right swinging movement). In flight, the drone is constantly submitted to external forces, the wind for example. These forces affect the above mentioned axes and therefore the direction of the drone. The purpose of the gyroscope is to automatically and instantly compensate them, to allow a straight flight, without disturbance. 3 or 6 axis gyroscope? As you can see, the 3 axes are pitch, yaw and roll. A 3-axis gyroscope provides stabilization of these three axes. But then, what are the three additional axes of a 6-axis gyroscope? In fact, none. A 6-axis gyro is a combination of a 3-axis gyro and an accelerometer, allowing it to distinguish between acceleration due to gravity and acceleration due to your steering. In short, the 6-axis gyro stabilizes the same 3-axis gyro, but in a way that limits the axes to 90°, so the drone will not turn over even if you push the steering joystick to the maximum. Similarly, the drone will refocus as soon as you let go of the joystick. A nice piloting aid for beginners, but it limits the drone in its "capabilities" for an experienced pilot. We recommend that you start with a drone equipped with at least a 6-axis gyroscope. It is the second element (if you started in altitude hold or GPS) that you should avoid for learning a racing or freestlye piloting, but remains essential in all circumstances for other uses. | ||
Basic features for a beginner
No surprises here. The two major features for a drone to start with will be its solidity and its potential for repair.
Then comes a big question depending on your personality: do you want to learn indoors, out of the spotlight, or outdoors, under the (potentially teasing) eyes of curious people?
No doubt, we strongly recommend that you start indoors. This more docile environment will allow you to avoid trouble. On the other hand, we recommend you to be careful with your furniture and with the people around you, in order to avoid other types of trouble. | ||
Additional features for comfort
Some additional features and tips that will bring you comfort or accuracy in your choices.
Finally, other recommendations depending on your goals.
| ||
Knowing the regulations
Let's come to the annoying chapter: in Switzerland or elsewhere, the airspace is generally very regulated. This is for security and/or privacy purposes. As we are not experts in this topic, we have chosen these two links which seem to be the most clear and appropriate: However, you might want to know that with the micro drones for beginners that we recommend at the end of this article, as well as by flying indoors, you won't be at much risk. It would take a lot of bad karma to break any of these laws.Beyond these strict and sometimes complicated rules, a few simple and common sense advices, which should avoid you most of the potential problems:
| ||
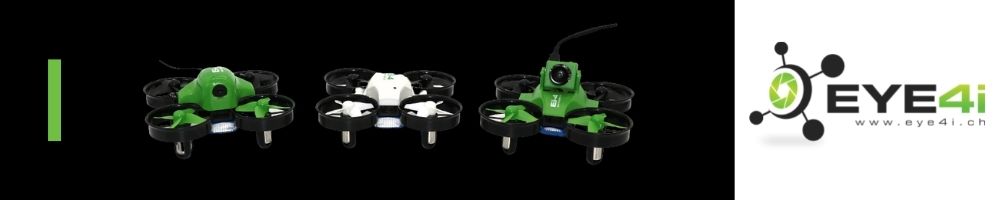
Our drone recommendations for beginners
Our store is full of choices. For all ages, all audiences and almost any purpose. Below you will find a selection of drones that are easy to handle. Their main features are summarized along with our comments and tips. All the drones chosen are from the EYE4i brand, not because it's our brand (a little bit anyway), but mainly because they are the most suitable for novice pilots, while having an excellent quality-price ratio. 1. Ei-4H Mini drone (altitude hold)The Rolls of the flight school. A bit more expensive than the following drone, due to the fact that it is equipped with a barometer (altitude hold), it has the perfect characteristics to give you a smooth learning experience: light, several speed modes, propeller protections, stabilized (all axes and altitude), solid and fully repairable. With the DIY version, the drone will be delivered in kit. So you will learn how to repair it before you even break it.
2. Ei-4 Mini drone (standard, STAB mode)The mini drone entry level. The same as in point 1, but without barometer (standard version - STAB mode). It is therefore not stabilized in altitude. The pilot will have to manage it manually. It is an excellent choice to learn "the hard way". Closer to the racing mode than the Ei-4H, it can be a very good step before switching to the accro mode, or simply for a drone with a more wild flight than the Ei-4H.
3. Ei-4HS Mini drone and Ei-4S Mini drone, in pack Tiny Whoop modeSame frame and same characteristics as the other drones presented, but equipped with a 5.8G camera and in pack with a FPV mask (First Person View). Available in its altitude hold and standard versions, we have the ideal pack for learning to fly FPV.
For people who already own a pair of FPV goggles, the Ei-4HS and Ei-4S can also be purchased alone.
4. Ei-4 Mosquito DIY kitThe perfect choice to learn the ACRO mode quietly in your living room in visual flight. Delivered in kit version, the Mosquito is very easy to assemble and will teach you the basic elements of a drone, their links to each other and their configurations. Ultra resistant and light, it is harmless for the house and almost impossible to break. Enough to fail your first looping a few hundred times.
5. Ei-4 Starling brushless FPVWith the Starling, we raise a level. Equipped with brushless motors, it offers more advanced flight performances. Being able to evolve in STAB and ACRO mode, it is a good choice to develop your FPV skills on a more powerful drone, more like a racing drone. Be careful however, it is preferable to already have some flight experience before switching to this kind of model, as piloting errors can become more problematic.
TricksSome good things to know about the Ei-4 series.
| ||
We hope we've helped you, and we'd love to answer any questions you may have or improve our article. All your remarks are welcome by email (support@eye4i.ch) or in comment of the Facebook post. |
 en
en