


No products
To be determined Shipping
0.00 CHF Total
Blog Categories
Latest Posts


Making the best choice of guiding material. Explanations, features and compatibilities, along with our tips.
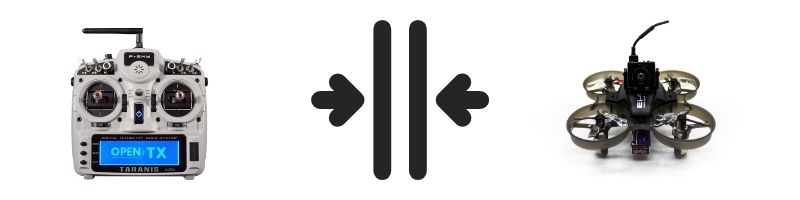
Introduction to Drone Radio TransmittersThe radio transmitter is a crucial element for controlling a remote model, often underestimated by beginners but holding paramount importance. This is especially true in the realm of configurable drones. In this article, we will navigate through the essential characteristics of radio transmitters, aiding you in understanding their compatibilities. After delving into the foundational components necessary for remote control, we will explore topics like binding, channels, and modes, along with the configuration of a transmitter. Finally, before we wrap up, to ensure your initial crashes remain strictly virtual, we'll present a curated selection of top-flight simulators available in the market. In essence, consider this your toolkit for making an astute hardware choice, guaranteeing an optimal piloting experience. Understanding Different Signal TypesLet's start with a bit of general knowledge. First and foremost, there are two major categories of remote controls, but only one captures our attention in the realm of modeling. Infrared Signal RemotesPrimarily used for controlling your television, these remotes require direct alignment with the receiver (your TV). They utilize infrared waves to transmit signals from the emitter (the remote) to the receiver (the TV). This technology operates over short distances, is hindered by obstacles, and requires a straight-line connection. Clearly, it holds no relevance in the world of modeling. Radio Frequency (RF) Signal Remotes
Employed for nearly all other applications, RF signal remotes function through radio waves transmitted from the emitter (the transmitter) to the receiver (in our case, the drone). Unlike infrared, radio waves don't necessitate direct alignment with the receiver, can cover significant distances, and are unobstructed by obstacles. It's apparent that RF remotes are the ones we're keen on for modeling purposes. Different Types of Remote Controllers
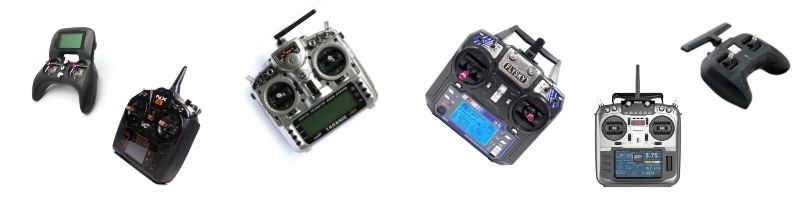
Firstly, let's distinguish between what we'll call "toy" remotes and programmable remote controllers.
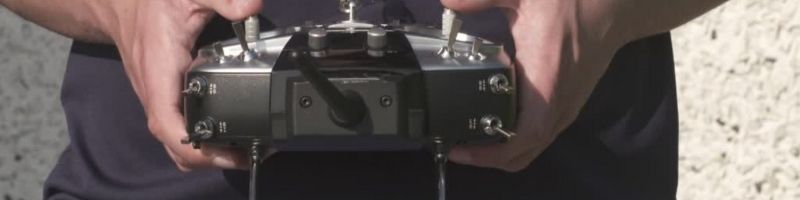
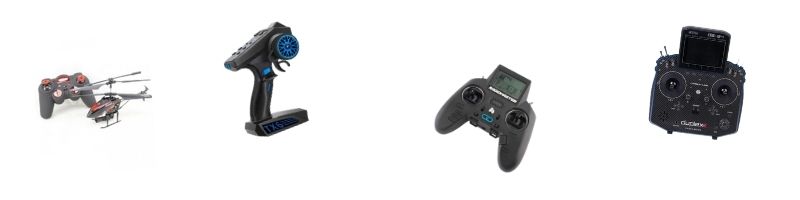
In this article, we'll exclusively focus on programmable remote controllers. The others (the "toy" type) don't require a painstaking selection process, as they come bundled with the remote-controllable model. Next, it's necessary to mention the two possible types of control mechanisms: stick controllers and trigger and wheel controllers. Trigger and wheel controllers (second remote from the left in the illustration above) are more limited and better suited for piloting vehicles or boats. Here, we'll only discuss stick controllers. Finally, the last point concerning the appearance of the remote controller is its aesthetics and comfort while piloting. This criterion is subjective, depending on your preferences and your goals as a pilot. Some prefer a larger remote controller for a better grip, while others opt for more compact and lightweight models that can easily fit in a bag or jacket pocket. Take your time to explore the various options, examine photos and dimensions, and if possible, test out different remote controllers to make the choice that suits you best. Understanding Radio Frequencies
The topic of radio frequencies (or radio waves) might seem intricate, but we'll simplify it to the fullest. In the context of remote controllers, radio frequencies serve as the means of communication between the transmitter (the remote controller) and the receiver (the drone). These frequencies are measured in Hertz and play a pivotal role in transmitting signals between the two devices. For communication to take place, both the transmitter and receiver must use the same frequency. A lower frequency theoretically offers a longer range, although other factors also come into play. In the realm of drone piloting, the most widespread frequency is 2.4 GHz. We recommend adhering to this standard. For longer control distances, frequencies of 868 MHz and 915 MHz also exist, but these are subject to strict regulations. | ||
Essential Components of Radio Transmitters
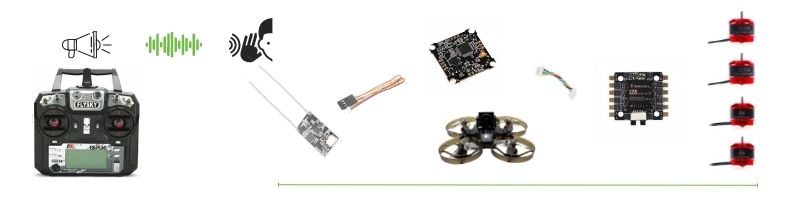
To operate, a radio transmitter requires both a transmitter and a receiver, capable of understanding each other and translating impulses into instructions. The transmitter is housed within the remote controller, while the receiver is a small integrated circuit onboard the drone (or the controlled object). These two components interact using radio waves to facilitate communication between the remote controller and the drone. Once instructions are transmitted from the remote controller to the receiver through radio waves, they need to be interpreted to enable the drone to perform specific actions, like accelerating or decelerating the propellers. This task is executed by the flight controller, which receives instructions from the receiver via a wired connection. However, the process doesn't stop there. To manage the individual motor rotation speed of the drone, an additional component known as the Electronic Speed Controller (ESC) is required. In summary:
The Receiver: The Drone's Ear
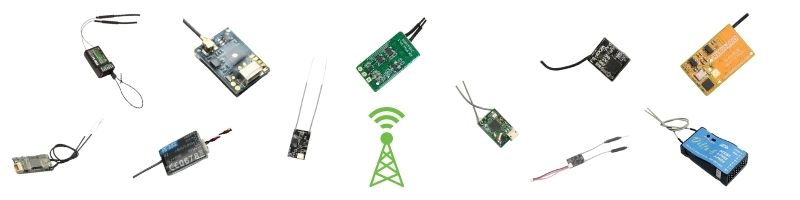
As previously mentioned, the receiver is a component located on the drone. It plays a pivotal role in receiving the instructions transmitted by the remote controller (transmitter). Often referred to as the RX (receiver), the choice of the receiver is critical to ensuring reliable communication between the remote controller and the drone. When selecting a receiver, several criteria need to be considered. First and foremost, compatibility with your remote controller is essential to ensure their interoperability. Next, the number of channels (or lanes) of the receiver determines how many distinct commands it can receive and transmit to the flight controller. Receiver range is also a significant aspect, as it determines the maximum distance at which you can control your drone. The weight and form of the receiver should also be taken into consideration, especially for drones where space and weight are critical factors. In the following sections, we will further detail some of these criteria, particularly compatibility, to assist you in choosing the receiver best suited for your setup and needs. The Flight Controller: The Drone's Brain
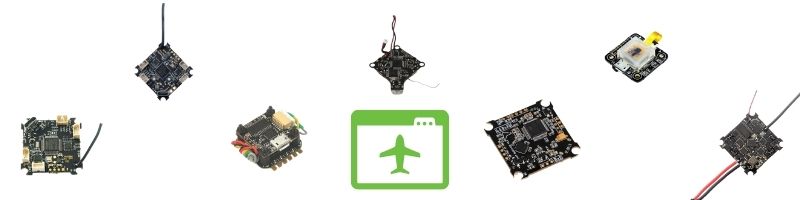
The flight controller can be likened to the brain of the drone. As the central unit, it receives information from all sensors, instructions from the remote controller, interprets them, and sends instructions to the drone's components. As is often the case in the world of drones, nothing will be straightforward when making your choice, and attention should be paid to a few criteria, in order of importance: the firmware (compatibility of protocols and configuration software), the power supply voltage, dimensions (ensuring there's ample space on your frame), and the number of ports to connect your peripherals. It's worth noting that some flight controllers integrate multiple features into a single unit, such as an On-Screen Display (OSD), a barometer, or even an Electronic Speed Controller (ESC). In summary, the flight controller is a vital element of the drone. Choosing the right model is pivotal to ensuring optimal performance and a successful flying experience. Electronic Speed Controllers (ESC): Speed Control Wizards
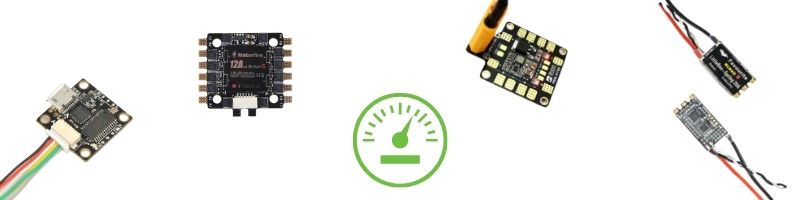
The ESC, short for Electronic Speed Controller, is a crucial component when it comes to managing your drone's speed. Operating on a per-motor basis, the ESC's role is to interpret instructions from the flight controller and adjust the power sent to the motors to achieve the desired outcome—whether it's increasing, decreasing, or stabilizing their rotation speed. ESCs can be integrated into the flight controller or added separately as standalone components. Some ESCs are even labeled as 4-in-1, indicating that all four ESCs are situated on a single circuit board. Otherwise, you'll need a separate ESC for each motor. | ||
Communication Protocols: The Drone's Language
Imagine communication protocols as languages. The transmitter and receiver must understand each other perfectly to execute the pilot's instructions accurately—essentially, they need to speak the "same language." In this chapter, we'll partially abstract the flight controller and completely exclude the ESCs, as they don't face the same compatibility complexity. Still, be mindful that the receiver's output port and its protocol are compatible with your flight controller's input. We'll distinguish communication protocols into two families:
In the realm of drone piloting, there's a multitude of these protocols. Below, we provide a non-exhaustive list of key protocols, categorized by type and compatibility. By delving into these communication protocols, you'll be better equipped to select the ones that best meet your requirements. It's essential to note that communication protocols are swiftly evolving in the drone piloting domain, and some information may become outdated over time. Therefore, it's always advisable to consult official sources and manufacturers' updates for the latest insights into communication protocols. TX Protocols: Emitter to Drone
TX protocols are used to transmit instructions from your remote control to the drone's receiver. These are the transmission protocols of the transmitter on your remote control. TX protocols vary between brands and are exclusive – each transmitter brand employs its own protocol. Frsky Brand Protocols
Spektrum Brand Protocols
Flysky Brand Protocol
Hitec Brand Protocol
Futaba Brand Protocol
Deviation / Devo Brand Protocol
TBS Brand Protocols
Immersion RC Brand Protocol
RX Protocols: Drone Receiver
RX protocols are the reception protocols of the receiver on your drone. They are responsible for receiving and understanding the instructions sent by the TX protocol and transmitting them to the flight controller. These protocols can be analog or digital. Some, from different brands, are compatible with all TX protocols, while others are specific and only work with certain brands of TX protocols. Wiring also plays a role. All components require at least a power cable and a ground cable. They also need one or more additional cables to manage the signal (the instructions). Analog RX ProtocolsOlder analog protocols communicate using signals and their durations. Sensitive to interference and susceptible to degradation over time, this technology is mostly used with older equipment.
Digital RX ProtocolsDigital RX protocols are known as "serial" protocols. They use a single signal wire to handle up to a maximum of 18 channels. In simplified terms, digital protocols communicate using sequences of 1s and 0s. They are more recent and less sensitive to interference than analog protocols. They do not degrade over time.
| ||
Binding Process, Channels, and ModesBinding Process
"Binding" or "pairing" your radio transmitter with your drone is the action that allows you to associate the two, enabling them to communicate exclusively with each other. The process involves activating the bind mode on both the radio transmitter and the drone to link them. The purpose of this step is to ensure an exclusive connection between the radio transmitter and the drone, guaranteeing that no other nearby transmitters can disrupt the communication established by this link. Channels
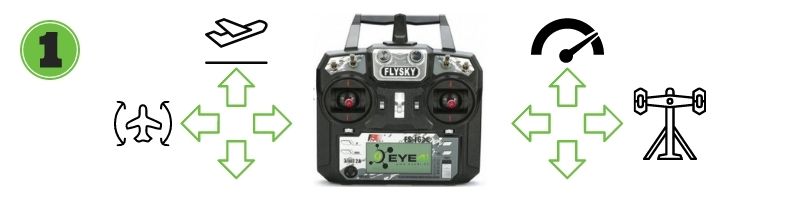
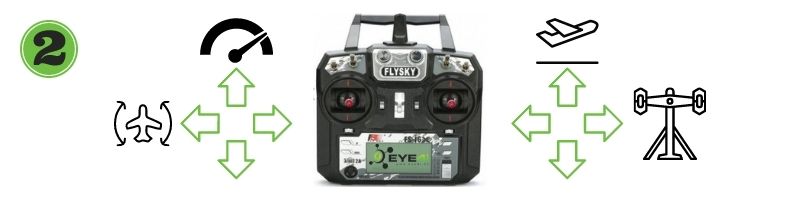
Channels are a crucial element of radio transmitters. They represent the number of independent commands that the radio transmitter can transmit to the receiver. Each command is associated with a button, switch, or joystick on the radio transmitter. Therefore, the more channels a radio transmitter has, the more control possibilities it offers. For example, a two-channel radio transmitter will allow you to control only two axes, such as left/right direction and acceleration/braking. A three-channel radio transmitter adds an additional command, while a four-channel transmitter allows both joysticks to move in all directions, providing more comprehensive control over the object being controlled. In the case of drones, a radio transmitter with at least four channels is considered the minimum, allowing control of essential drone movements. However, it's often recommended to opt for a transmitter with more channels, which can be useful for additional functionalities such as camera control, triggering a buzzer, or other accessories. However, high-end transmitters with 16 or more channels can be more expensive, so it's essential to choose a suitable number of channels based on your needs and budget. ModesModes in modeling are essential as they define the assignment of each joystick on the radio transmitter. Each mode assigns specific functions to each joystick, thus determining which movements will be controlled by them. It's important to choose the mode that best suits your needs and preferences. One of the main reasons that makes the choice of mode crucial is the addition of the automatic spring return (to the center) on certain axes. This return spring allows the joystick to automatically return to its center position once released. Since this mechanism is useful for some axes and disruptive for others, this point should be carefully considered. Interestingly, some regional trends are emerging. For example, Mode 1 seems to be more common in Europe, while in the United States, Mode 2 is more widely used. However, the choice of mode is personal and depends on each pilot's preferences. If you are new to modeling, it is advisable to choose the same mode as the people you will be practicing with, as this will facilitate learning and experience sharing. The modes will be distinguished below based on the main criterion that sets them apart: the placement of the throttle stick, on the right or left. This will help you better understand the specifics of each mode and choose the one that best suits your habits and flying style. Mode 1
Throttle on the right; left stick returns to center. Roll on the right; yaw and pitch on the left. Mode 2
Throttle on the left; right stick returns to center. Roll and pitch on the right; yaw on the left. Mode 3
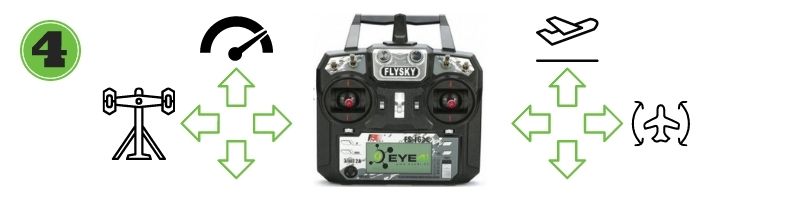
Throttle on the right; left stick returns to center. Roll and pitch on the left; yaw on the right. Mode 4
Throttle on the left; right stick returns to center. Roll on the left; yaw and pitch on the right. | ||
Programming and Configuration
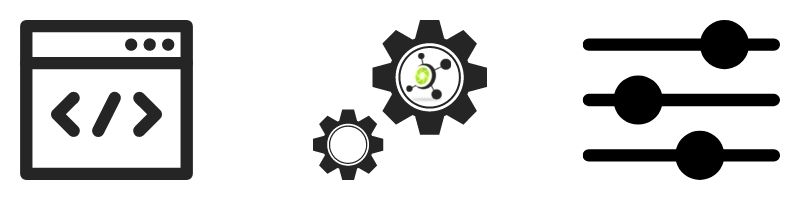
Three terms not to be confused:
Configuration and Associated Software
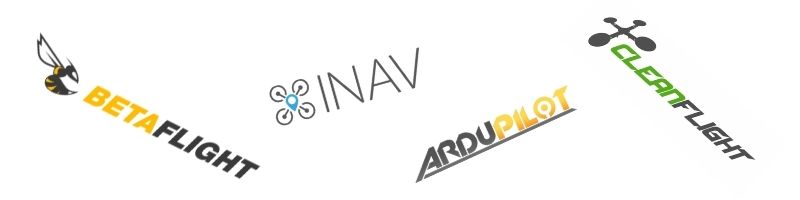
Here, we are specifically discussing configuration. To configure the drone-radio transmitter pair, there are several software options, more or less suitable depending on the desired use. There are many of them, but we will only mention the main ones.
In short, for drones, Betaflight is recommended for configuring racing or freestyle drones, and iNav is recommended for configuring aerial photography drones. Telemetry Usage for Monitoring
Telemetry in the context of drones is a remote measurement system. It allows the drone to collect crucial data, such as GPS coordinates, battery level, and other parameters, and transmit them in real-time to the radio transmitter. Telemetry records data on the drone using appropriate sensors. This data is then wirelessly transmitted to the radio transmitter, where it can be displayed on the screen for the pilot to monitor during flight. In addition to data display, telemetry can trigger alarms or automatic actions based on preconfigured thresholds. Telemetry offers several benefits to drone pilots. It provides real-time information about the drone's status, such as its geographical position, battery life, radio connection quality, and more. This information helps pilots make informed decisions and maintain full control over their drone during flight. To utilize telemetry, a compatible receiver is required. Some drones and radio transmitters come with telemetry technology built-in, while others may require upgrades or specific components to be added. The utility of telemetry depends on each pilot's needs and preferences. Some pilots may find on-screen display (OSD) information sufficient, while others appreciate the convenience and responsiveness of telemetry for quick and informed decision-making during flight. The decision to use this feature is a personal choice based on evaluating its benefits and the necessary adjustments to optimize the flight experience. Range and Limitations of Radio Transmitters
The range of radio transmitters is a crucial factor to consider. It represents the maximum distance over which reliable communication between the radio transmitter (transmitter) and the drone's receiver can be maintained. Naturally, the shorter of the two ranges is the one to consider. The range is generally specified in the user manuals of both the radio transmitter and the receiver. It's important to note that the actual range can be affected by various factors such as the environment, obstacles, radio interference, and weather conditions. Therefore, the actual range may be less than the theoretical range specified in the manuals. To avoid signal loss issues, it's strongly recommended to leave a safety margin during flight. This means the drone should never be taken to the limit of the specified range. By leaving a substantial margin, the pilot ensures that even if the signal is weakened or disrupted in certain situations, there's still a reliable connection with the drone. Signal loss can lead to disorientation, loss of control, and, in the worst cases, the drone crashing. To avoid serious problems, it's essential to fly cautiously, always keeping the drone within an area where communication with the radio transmitter remains strong and stable. Pilots need to be aware of the range limitations of their radio transmitter system and avoid unnecessary risks by not flying too far from the control point. By respecting range specifications, flying in open areas, and closely monitoring the signal, pilots can enjoy safe and enjoyable flights while avoiding accidents due to signal loss. Extensions with External Modules
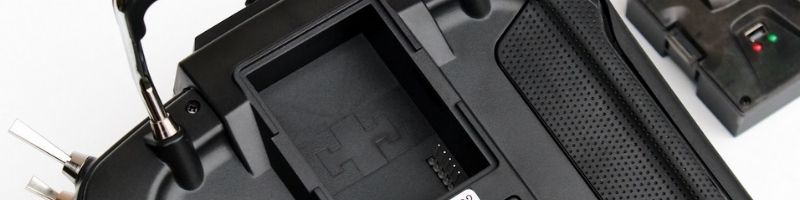
Some radio transmitters have slots for adding external modules. These modules are used to install "long-range" or performance-enhancing modules, such as reducing latency, for example. Other modules also extend the compatibility of the radio transmitter with other brands. However, not all functionalities work at 100%, and the use of certain modules may be restricted by regulations. Therefore, thorough research is recommended before using an external module. Community and Support
This is a point not to be underestimated. Some products may have issues, and others are equipped with open-source software. A wide community of experts allows you to find solutions to problems or requirements on various forums or articles. Don't hesitate to search the web before making a purchase. | ||
Exploring Simulators to Improve Your Skills
Using a simulator allows you to practice flying and hone your skills in a risk-free environment. They are especially valuable for newcomers to FPV who are learning the basics of drone piloting. Remember that while simulators can provide a realistic experience, actual flying conditions can still be different, so transitioning from simulation to real flight requires some adjustment. LiftoffProbably the most well-known and beloved by the community. It's easily accessible and has physics close to reality. It's compatible with Windows, OS X, available on Steam, as well as Xbox and Playstation. It features many maps, a multiplayer mode, and is favored by those seeking realism and simplicity. VelocidroneProbably the most advanced simulator on the market. Developed by Team Blacksheep, it's regularly updated, offers various configurations, and allows tweaking machine settings. It has numerous maps and tracks, and its physics are very close to reality. DRL SimulatorAs the name suggests, it's the Drone Racing League's simulator. Available on Steam, Xbox, and Playstation, it features the official league tracks, allowing you to compete with real-world pilots. Aster FPVA simulator developed in France, available on Steam. Customizable with a variety of settings, it offers unique modes like first-person shooter (FPS) battles and object tracking within the environment. FPV Air 2A drone racing flight simulator with a wide variety of maps and drones. It's appreciated for its realistic controls and user-friendliness. Liftoff AcademyA more accessible and simplified version of Liftoff, ideal for beginners who want an initial introduction to drone piloting. | ||
Overview of Drone Transmitter Brands
The world of drones and modeling is brimming with various brands of transmitters, each with their own unique specifications and qualities. When making your choice, be sure to consider each element mentioned in this article, especially compatibility. Below, we list some of the leading brands in the market, outlining their key characteristics. However, keep in mind that subjectivity may play a role, so forming your own opinion is essential. Flysky RadiosExcellent entry-level radios. Affordable, user-friendly, with good performance and a simple, intuitive setup. Basic functions are available, with 6 channels for the FS-i6 and 10 channels for the FS-i6X. Given the minimal price difference between the two, we recommend the i6X for its additional channels. Turnigy Evolution RadiosUtilizes FlySky protocols. Compact, budget-friendly, similar to the FS-i6, but with 8 channels and software specifically geared towards drone usage. In essence, an entry-level transmitter that's simple and comprehensive, focusing on the essentials. FrSky RadiosOne of the most well-known and widespread brands in the FPV domain, largely due to the value offered by its flagship transmitter: the Taranis. Taranis transmitters are great choices for advanced users due to the customization level provided by their open-source OpenTX software. Pay attention to firmware choices, FCC or LBT EU. Your transmitter firmware must match the receiver's, and only LBT EU is allowed in Europe. With various models and prices, finding your preferred balance between quality, functionality, and price should be easy. They all have 16 channels, support telemetry, and can be connected to a computer via USB, whether for configuration or simulation. Another notable feature is their external bay for adding additional modules if needed. Jumper RadiosMostly multi-protocol. Among the multitude of available models, the Jumper T8SG is an entry-level multi-protocol transmitter with all basic features. A good compromise for starting at a lower price with extended compatibility (FlySky and FrSky). Spektrum RadiosWell-designed radios, slightly more expensive than the previous options. From the American brand Horizon Hobby, these transmitters are compatible only with DSM, DSM2, and DSMX protocols. Radiomaster RadiosRadiomaster transmitters are attractive and high-performing. However, you should expect to spend some time on configuration and learning their use. Multi-protocol and equipped with an external bay for most models, these are quality transmitters. Team Blacksheep RadiosAmong the numerous transmitters from Team Blacksheep (TBS), the Crossfire Tango II is a quality compact transmitter. It uses the CRSF Crossfire Shot protocol, is attractively priced, has a sleek design, and is small in size. However, it lacks an external bay and has a limited number of channels. TBS transmitters are primarily high-end, tailored for racing drones. They are renowned for their performance and reliability, making them favored by advanced pilots. Yet, their high price and complexity might discourage beginners. Futaba RadiosA well-respected brand in the modeling realm, Futaba offers quality transmitters with a wide range of features. However, their price and complexity might deter some. DJI RadiosDJI transmitters are only compatible with their own devices. Therefore, they are perfectly suited for DJI drones, but incompatible with other brands. | ||
External Resources and Community SupportThe topic is vast and cannot be covered in detail and comprehensiveness all at once. For specific supplementary information on certain subjects, please find below a list of articles we have selected along with some additional tips. OpenTX Documentation for TransmittersFrSky Database: link. Access protocol: link. Tips and Tricks for a Better ExperienceHere are a few miscellaneous tips and reminders:
These resources and tips should provide you with a strong foundation for understanding and working with drone transmitters. Don't hesitate to further explore the articles mentioned and engage with the FPV community for more insights and guidance. | ||
Final ReflectionsIn the realm where technology meets imagination, where drone and controller dance to the symphony of the skies, the quest for the perfect transmitter becomes a journey that transcends the ordinary. As we traverse the constellations of features and compatibility, let not the cosmic complexity daunt you, for within the labyrinth of choices lies the key to unlocking a universe of control. Like a celestial map guiding the lost traveler, this guide has illuminated the path to choosing the transmitter that will orchestrate your flight. Yet, should you find yourself adrift in a sea of uncertainties, remember that the stars themselves whisper their secrets to those who dare to inquire. Our team, the cosmic guides of your radiocommande odyssey, stand ready to embrace your questions and concerns. As we journey together through the expanse of transmitters, let our collaboration be as harmonious as the celestial bodies in their intricate dance. With each click of the throttle, each twist of the knob, let the exhilarating embrace of command take you to galaxies uncharted. EYE4i, with its luminous spirit, embarks with you on this cosmic flight, where the cosmos are not mere limits but gateways to infinite control. So, fellow seeker of the skies, prepare to ascend into a realm where technology melds with dreams, where transmitters are not mere devices but conduits of empowerment. Cast aside the mundane, embrace the extraordinary, and let the symphony of transmitters and drones resonate in the firmament. In this journey, the universe is your canvas, the transmitter your brush, and the sky your masterpiece. As you lift off, remember: the universe is your stage, and you, dear pilot, are the star. |
 en
en